
本教程所使用系统为 d ebian9,也推荐 d ebian9!
本教程的配置最终为:
Ngin x 入口 H TTP S 流量,将 w s s 流量转发到 V 2ra y 应用的端口上。
V2ra y 采用 n on e 加密可以有效提高网络传输性能,服务端无需指定,需要在客户端指定。
V2ray
从官方 G itHu b 下载安装 v 2
mkdir /home/v2ray && cd /home/v2ray

apt-get install unzip -y
apt-get update
apt-get install unzip -y

wget https://github.com/v2ray/v2ray-core/releases/download/v4.21.3/v2ray-linux-64.zip
unzip v2ray-linux-64.zip
删除默认 V 2RA Y 配置,写入自己的配置。
# 删除默认配置
rm -f /home/v2ray/config.json

#写入自己的配置
vi /home/v2ray/config.json
配置内容如下:
{
    "stats": {},
    "api": {
        "services": [
            "StatsService"
        ],
        "tag": "api"
    },
    "routing": {
        "strategy": "rules",
        "settings": {
            "rules": [
                {
                    "inboundTag": [
                        "api"
                    ],
                    "type": "field",
                    "outboundTag": "api"
                }
            ]
        }
    },
    "inbounds": [
        {
            "streamSettings": {
                "wsSettings": {
                    "path": "/rayd"
                },
                "network": "ws",
                "tcpSettings": {
                    "header": {
                        "type": "http",
                        "response": {
                            "status": "200",
                            "headers": {
                                "Transfer-Encoding": [
                                    "chunked"
                                ],
                                "Connection": [
                                    "keep-alive"
                                ],
                                "Content-Type": [
                                    "application/octet-stream",
                                    "application/x-msdownload",
                                    "text/html",
                                    "application/x-shockwave-flash"
                                ],
                                "Pragma": "no-cache"
                            },
                            "reason": "OK",
                            "version": "1.1"
                        }
                    }
                }
            },
            "protocol": "vmess",
            "port": 5002,
            "settings": {
                "clients": [
                    {
                        "alterId": 64,
                        "level": 0,
                        "email": "1000",
                        "id": "5bc1eae0-8e84-fc7a-d403-aee6dd500dff"
                    }
                ]
            }
        },
        {
            "tag": "api",
            "settings": {
                "address": "127.0.0.1"
            },
            "protocol": "dokodemo-door",
            "port": 5001,
            "listen": "127.0.0.1"
        }
    ],
    "policy": {
        "levels": {
            "0": {
                "statsUserUplink": true,
                "statsUserDownlink": true
            }
        },
        "system": {
            "statsInboundDownlink": true,
            "statsInboundUplink": true
        }
    },
    "outbounds": [
        {
            "protocol": "freedom",
            "settings": {}
        },
        {
            "tag": "blocked",
            "protocol": "blackhole",
            "settings": {}
        }
    ]
}
参数解释
配置 V 2ra y 监听5002端口,并指定为vmess协议,在网络通信外层,采用ws(websocket)。
用户默认配置了一个,可自行在 JSON 中添加,emai l 即是用户标志,可理解为用户名或邮箱地址。
id,如 5 bc1eae0-8e84-fc7a-d403-aee6dd500dff,即认证参数,需要与客户端保持一致。
alterId,官方建议 1 0,本文这里建议 6 4。
Nginx
这里安装 N gin x 的目的是通过 N gin x 这个高性能 w e b 前端服务器,配置一个https(tls)网站,并将 w ebsocke t 流量转发到 v 2ra y 上。在干扰严重的网路环境下,可以实现很稳定传输效率。
安装 N ginx
通过 a p t 包管理安装 n ginx
apt-get install nginx -y
apt-update
apt-get install nginx -y
Ngin x 入口 H TTP S 流量转发至 V 2,的 N gin x 配置方法。
vi /etc/nginx/sites-enabled/v2.conf配置内容为:
server {
  listen  443 ssl;
  ssl on;
  ssl_certificate       /etc/cert/server.crt;
  ssl_certificate_key   /etc/cert/ca.key.nopass;
  ssl_protocols         TLSv1 TLSv1.1 TLSv1.2;
  ssl_ciphers           HIGH:!aNULL:!MD5;
  server_name           hk.baidu.com;# 替换为你的域名,也可以是公网 I  P 地址
        location /rayd {
        proxy_redirect off;
        proxy_pass http://127.0.0.1:5002;
        proxy_http_version 1.1;
        proxy_set_header Upgrade $http_upgrade;
        proxy_set_header Connection "upgrade";
        proxy_set_header Host $http_host;

        # Show realip in v2ray access.log
        proxy_set_header X-Real-IP $remote_addr;
        proxy_set_header X-Forwarded-For $proxy_add_x_forwarded_for                                                                                                                          ;
        }
}
配置说明
ngin x 以serve r 的身份监听一个 4 4 3 端口,并声明端口为 s s l 协议,即实现 H TTP S 网站。
其中的 hk.baidu.com 需要具体替换为自己的域名或公网 I P 地址。
证书以及 k e y 的路径指定,如有域名可申请免费的安全证书。申请将证书路径配置完毕即可。
ssl_certificate       /etc/cert/server.crt;
ssl_certificate_key   /etc/cert/ca.key.nopass;
如在内网中,无法实现脚本获取证书,可通过其他机器申请到证书后,再将证书移植到内网配置使用。
若无域名无证书,最终可采用自签证书方式,并不推荐。
引用文章:Openss l 自签证书|Ngin x 配置全站 H TTPS,包括 W SS(websocket)
# 进入证书生成目录
cd /etc/cert/
openssl genrsa -des3 -out ca.key 1024
openssl rsa -in ca.key -out ca.key.nopass
# 这一步需要配置域名相关信息,请务必真实。
openssl req -new -key ca.key.nopass -out server.csr
openssl x509 -req -days 365 -in server.csr -signkey ca.key.nopass -out server.crt
将 N gin x 加入开机启动项
systemctl enable nginx运行
systemctl restart nginx
/home/v2ray/v2ray -config /home/v2ray/config.json
最终
连接信息为:
目标 I P:hk.baidu.com
端口:443
用户 I D:5bc1eae0-8e84-fc7a-d403-aee6dd500dff
alterId:64
加密方式:none
传输协议:ws(websocks)
伪装 h ost:hk.baidu.com
路径:/rayd
底层传输:tls
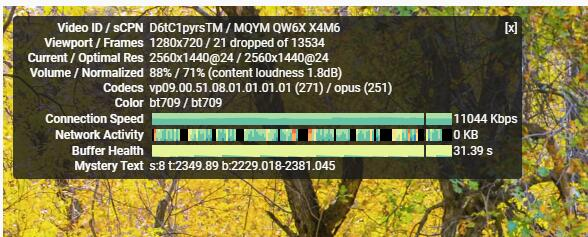
allowInsecure:True配置 t l s 后的 R ussia n 测速,之前仅有 4 00 0 不到。
扩展功能
以上的配置信息中也包含了流量统计功能,使用方法具体如下:
查看流量统计信息
/home/tools/v2ray/v2ctl api --server=127.0.0.1:5001 StatsService.QueryStats 'pattern: "" reset: false'参数 reset 可选为 false 或者 true,意为是否查询完毕后清空流量数据。
即查询完毕清空流量可使用:
/home/tools/v2ray/v2ctl api --server=127.0.0.1:5001 StatsService.QueryStats 'pattern: "" reset: true'获取到的数据形式,如:
stat: <
  name: "inbound>>>api>>>traffic>>>downlink"
  value: 17905
>
stat: <
  name: "user>>>1000>>>traffic>>>uplink"
  value: 166882
>
stat: <
  name: "user>>>1000>>>traffic>>>downlink"
  value: 3977881
>
stat: <
  name: "inbound>>>api>>>traffic>>>uplink"
  value: 11792
>
除了我们定义的emai l 为1000的用户以外,还包含了接口 a p i 的流量数据,一般也可以忽略不计。


Comments